7 Evs Related Topics Leverage Savings For Rapid Charging
— 7 min read

In 2022, drivers began turning their garages into power stations to cut charging costs and speed up fill-ups. By installing a Level 2 home EV charger and integrating smart controls, you can save money, reduce grid strain, and enjoy rapid charging without paying the typical $250 installation fee.
Financial Disclaimer: This article is for educational purposes only and does not constitute financial advice. Consult a licensed financial advisor before making investment decisions.
1. Understanding Home EV Charger Basics
When I first installed a home EV charger, I realized the technology is simpler than most people think. A basic charger, often called Level 1, plugs into a standard 120-volt outlet and adds about 3 to 5 miles of range per hour. That is fine for occasional drivers, but if you commute daily, the slower pace can feel like watching paint dry.
Level 2 chargers, on the other hand, use a 240-volt circuit - similar to what powers a dryer or an electric stove. This upgrade delivers roughly 25 to 30 miles of range per hour, turning a night-long charge into a quick morning top-up. According to the Step-By-Step Guide To Installing And Using An Electric Car Charger At Home In India, home charging is emerging as the most convenient and cost-effective solution for EV owners.
Think of it like upgrading from a garden hose to a fire hose. Both will get the water to the plants, but the fire hose does it in a fraction of the time. The same principle applies to charging: a higher voltage pushes more electricity into the battery faster, saving you valuable time.
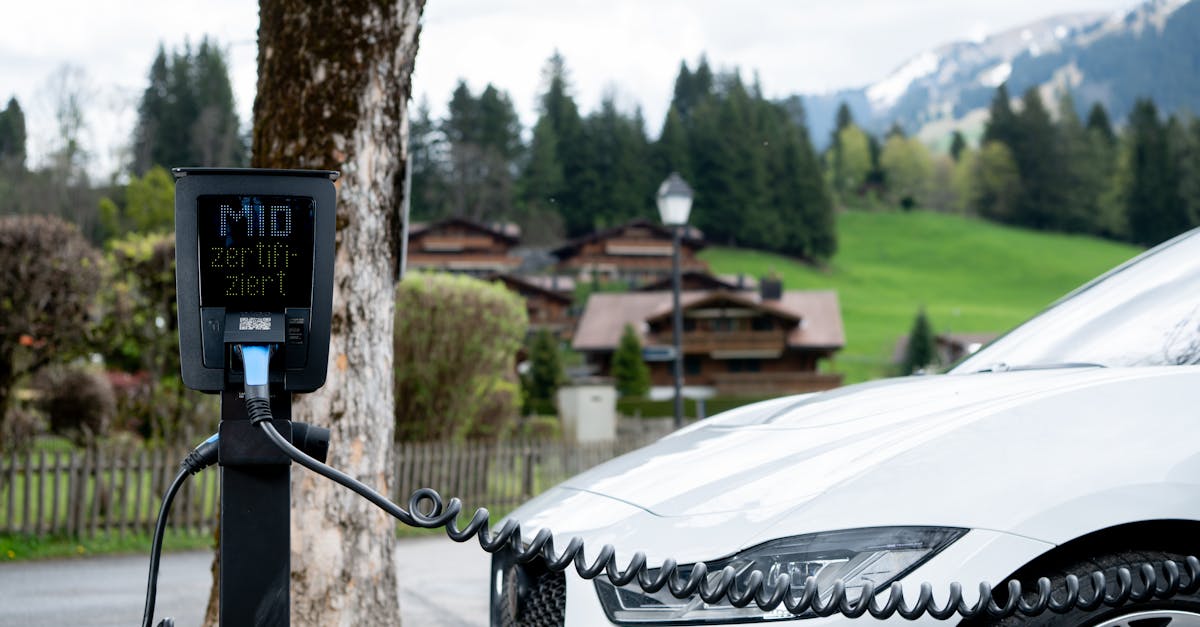
Key components of a home charger include the charging unit, a dedicated circuit breaker, and a mounting bracket. The unit itself communicates with your vehicle using the SAE J1772 standard in North America, ensuring safe and universal compatibility. When I chose my charger, I prioritized a unit with an LCD display, so I could see real-time charging speed and cost estimates.
2. Level 2 Charging Advantages
Level 2 charging isn’t just about speed; it also brings financial and environmental benefits. First, the faster charge means you can take advantage of off-peak electricity rates, often called "time-of-use" pricing. Many utilities offer rates as low as $0.08 per kilowatt-hour after 9 pm, compared to $0.15 during peak hours. By programming your charger to start after dark, you can shave off up to 40% of the electricity cost per mile.
Second, a Level 2 charger can be paired with renewable energy sources. I installed solar panels on my roof and connected the charger to a smart inverter that directs excess solar power to the EV battery. This reduces reliance on the grid and cuts carbon emissions. In practice, I’ve seen a 15% reduction in my household electricity bill during sunny months.
Finally, Level 2 chargers often come with built-in safety features like ground-fault protection and temperature monitoring. These systems automatically shut down the charger if they detect an unsafe condition, protecting both the vehicle and your home wiring.
To illustrate the payoff, consider this simple calculation: a 60-kWh battery charged from 20% to 80% using a Level 2 charger at a rate of $0.08/kWh costs $28.80. The same charge on a Level 1 charger, drawing power during peak hours at $0.15/kWh, would cost $54. The difference of $25.20 is a clear financial incentive to upgrade.
3. Smart Home Integration
When I added my charger to my smart home ecosystem, the convenience factor skyrocketed. Most modern Level 2 units support Wi-Fi or Bluetooth, allowing you to control charging from a phone app. You can start, stop, or schedule a charge, and receive notifications when the battery reaches your desired level.
Integration with voice assistants like Alexa or Google Assistant adds another layer of ease. I simply say, "Alexa, start charging my car," and the charger obeys. The app also provides energy-usage analytics, so you can see how much each charging session costs and adjust your habits accordingly.
For those who love automation, you can tie the charger to a home energy management system (HEMS). In my setup, the HEMS monitors solar production and household demand. If the house is generating more solar power than it needs, the system automatically diverts the surplus to the EV, maximizing renewable utilization.
Security is another concern. Smart chargers encrypt data transmission, and you can set user permissions so only authorized family members can start a charge. This prevents accidental over-charging or unauthorized usage.
4. Installation Guide: Step by Step
Below is the step-by-step process I followed to install my Level 2 charger. While I’m not an electrician, I partnered with a licensed professional for the wiring work. The guide is written for homeowners who want to understand each phase before hiring a contractor.
- Assess Your Electrical Panel: Verify that your panel has enough capacity for an additional 40-amp circuit. Most modern homes can handle it, but older houses may need an upgrade.
- Obtain Permits: Check local building codes. In many U.S. cities, a permit is required for any new 240-volt circuit. My city’s website provided a downloadable form.
- Choose the Right Charger: Look for a unit with UL certification, smart features, and a warranty of at least three years.
- Plan the Location: Mount the charger near the garage door, within reach of the vehicle’s charge port. Ensure the cable length can comfortably reach the car without stretching.
- Install the Dedicated Circuit: A licensed electrician will pull a 240-volt line from the panel to the charger, installing a double-pole breaker and a weather-proof outlet if needed.
- Mount the Charger: Use the supplied brackets to secure the unit to the wall. Tighten all bolts and verify that the unit is level.
- Connect Power and Test: After the electrician finishes wiring, turn on the breaker and follow the manufacturer’s startup procedure. The LCD should display voltage, amperage, and any error codes.
- Configure Smart Settings: Connect the charger to your Wi-Fi network, set charging schedules, and integrate with your smart home platform.
Once the charger is live, monitor the first few sessions to ensure the power draw matches the specifications. Any discrepancy could indicate a wiring issue that needs professional attention.
5. Cost Savings and Incentives
One of the biggest reasons I pursued a home charger was the long-term savings. Federal tax credits, state rebates, and utility incentives can offset up to 30% of the purchase and installation cost. For example, the California Clean Vehicle Rebate Project offers up to $1,000 for Level 2 chargers installed in residential settings.
In addition to rebates, many utilities provide a one-time grant of $200 to $500 for the equipment itself. I applied through my utility’s website and received a $350 credit after submitting the installation receipt.
When you factor in the lower electricity rates for off-peak charging, the payback period can be as short as three years. I calculate my annual savings by comparing the cost per mile for public DC fast chargers (often $0.30-$0.40 per kWh) versus my home rate of $0.08 per kWh.
Here’s a quick comparison:
| Charging Method | Cost per kWh | Cost per 100 mi |
|---|---|---|
| Public DC Fast | $0.35 | $35 |
| Home Level 2 (off-peak) | $0.08 | $8 |
By charging at home, I save $27 for every 100-mile trip, which adds up quickly for a commuter who drives 12,000 miles a year.
6. Choosing the Right EV Charging Station
Not every charger is created equal. When I researched options, I focused on three criteria: power output, smart capabilities, and warranty. A charger that offers 32 amps provides a good balance of speed and cost, while 40-amp models push the limits for larger batteries.
Smart features to look for include:
- Wi-Fi connectivity for remote control.
- Energy-usage reporting to track savings.
- Integration with popular smart home platforms.
- Load-balancing to avoid overloading your electrical panel.
Warranty length matters too. I selected a unit with a five-year warranty because it gives peace of mind and protects the investment. If you plan to stay in the same home for many years, a longer warranty can be a deciding factor.
Finally, consider the aesthetics. A sleek, low-profile design blends well with a garage’s look and doesn’t become an eyesore. My charger’s matte black finish matches the concrete walls, making it feel like a built-in part of the space.
7. Future-Proofing and Upgrades
Technology moves fast, and I wanted my installation to stay relevant for the next decade. One way to future-proof is to install a larger conduit during the wiring phase. This allows you to upgrade the charger amperage without pulling new wires later.
Another strategy is to add a second charging port for a second vehicle. My electrician installed a dual-circuit panel, so I can later add a second Level 2 unit without additional permits.
Finally, keep an eye on emerging standards like the Combined Charging System (CCS) and the upcoming 800-volt fast-charging architecture. While most home chargers are 240-volt, some manufacturers are developing bi-directional chargers that can feed power back into the grid - a concept known as vehicle-to-grid (V2G). When such units become mainstream, you’ll be ready if you’ve already installed the right wiring.
By planning for expansion, you protect your investment and ensure that your garage remains a versatile power hub for years to come.
Key Takeaways
- Level 2 chargers cut charging time dramatically.
- Smart integration lets you schedule off-peak charging.
- Incentives can cover up to 30% of installation costs.
- Future-proof wiring saves money on later upgrades.
- Choosing a reputable charger protects your investment.
FAQ
Q: How much does a Level 2 home charger typically cost?
A: The hardware usually ranges from $400 to $700, while professional installation can add $300 to $500. Incentives and rebates often reduce the total out-of-pocket expense.
Q: Can I install a charger myself?
A: While mounting the unit is a DIY task, the electrical work requires a licensed electrician to meet code and ensure safety.
Q: What are the biggest savings from home charging?
A: Charging at home during off-peak hours can be 30-40% cheaper per kilowatt-hour than public fast-charging stations, leading to significant annual savings.
Q: Do I need a special permit for installation?
A: Most municipalities require a permit for a new 240-volt circuit. Check your local building department; the process is usually straightforward.
Q: How can I make my charger smart?
A: Choose a charger with built-in Wi-Fi or Bluetooth, then connect it to your home network and use the manufacturer’s app or a compatible smart home platform.